Design your own packing table in 3 steps
6min read
14/10/2022


A webshop without its own parcel table is like an engine without fuel. Whether you’re a small start-up or a large international online store, the parcel table is an essential part of your logistics. In this article, we will show you in 3 steps how to set up your parcel table in a smart and ergonomic way, adapted to your everyday life. In the long run, this will save you valuable time and make your work more comfortable. Have fun!
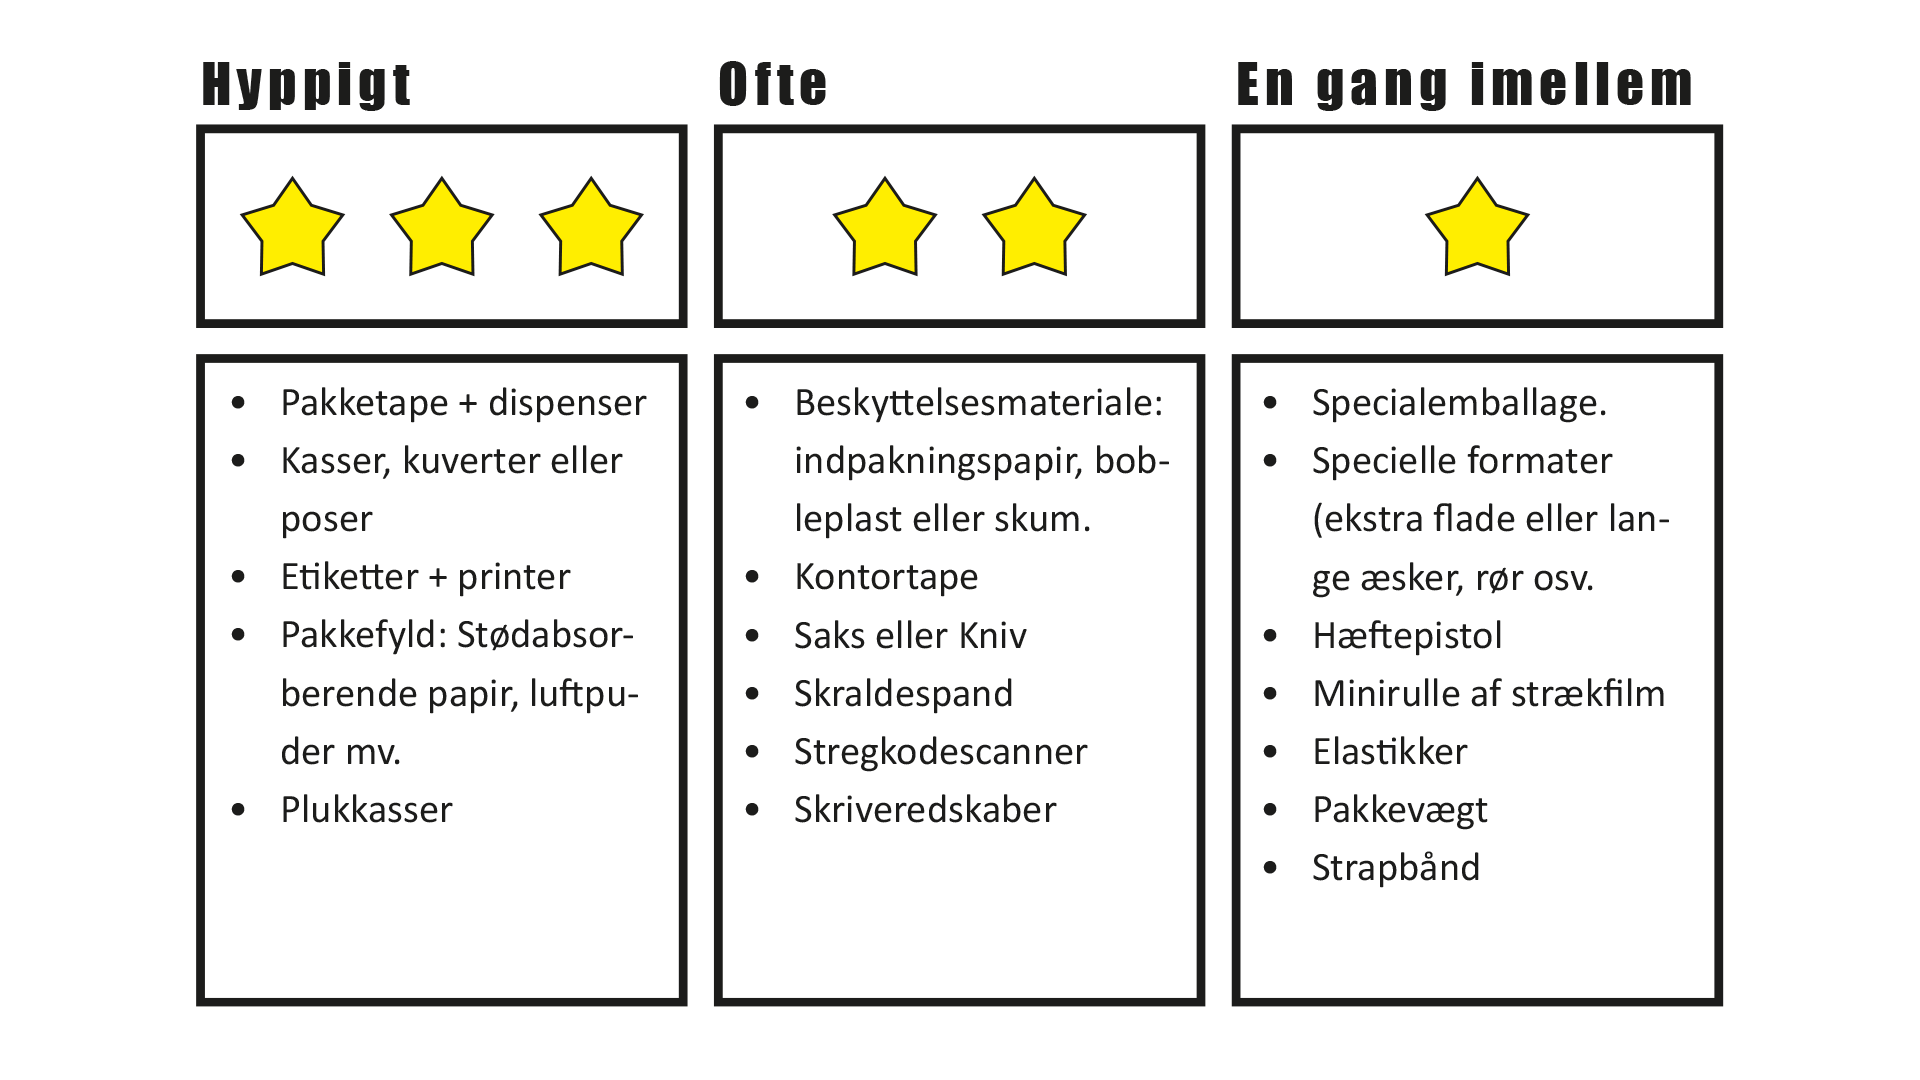
Every shop is different. range of products etc. and therefore there are also many different needs to be met. Therefore, equip your packing table with tools and packaging according to your products. The focus here can be on: very large (or unusually small) products, fragile goods, special formats, etc. Below we have listed the most popular packing tools, according to their use:
Tip: Save space at your packing table and limit the number of box sizes at your station or warehouse. For example, choose a box with variable filling height: you can adjust 1 box to 12 heights, then you can pack many different products with only this one box.
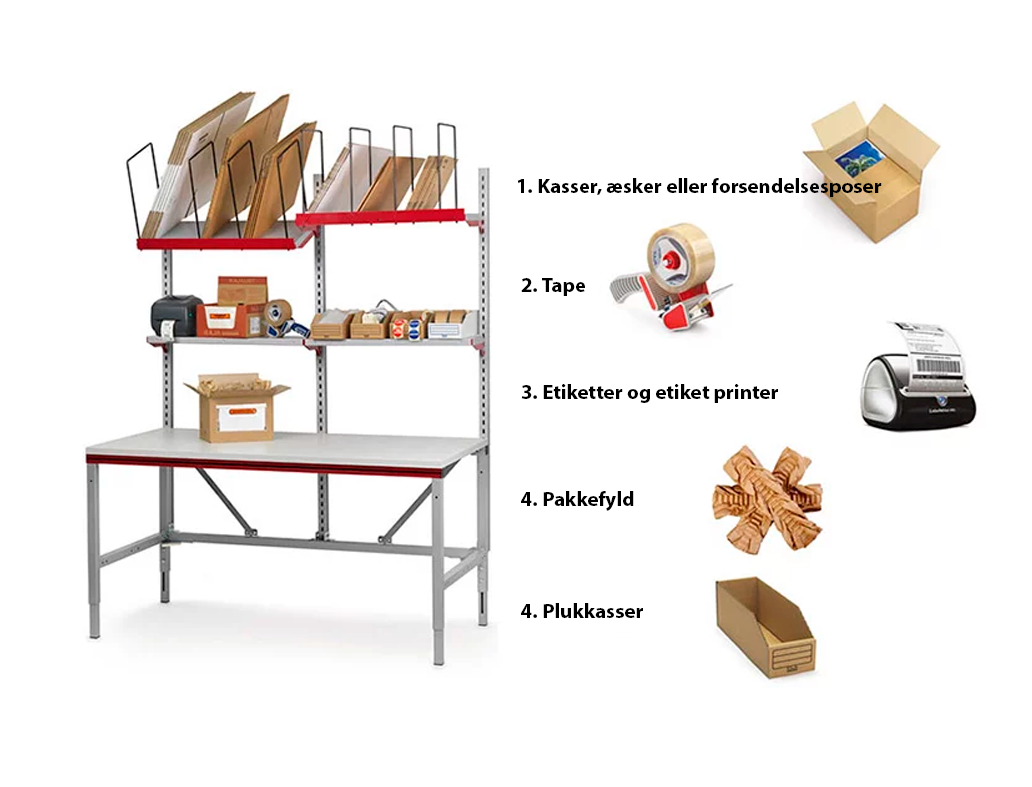
Once you’ve figured out which tool and packaging you’ll need, you can move on to step 2. We’ll now give each tool its ideal place on your packing table. What matters here is that you can work quickly and efficiently. The most commonly used material should therefore always be within reach. We’ll divide your table into three zones:

Tip: A packing machine doesn’t have to be big and heavy at all. There are also very compact table models such as Geami WrapPak® (for paper) or AirFirst® (for air pillows).
At RAJA we have a system called SYSTEM FLEX, here you can build your very own set-up in cooperation with our experts. The SYSTEM FLEX series from Hudig Rocholz is the absolute best option for a customizable and flexible workstation based on your own needs.
With SYSTEM FLKEX you can easily adjust the height of shelves, legs and accessories. The perforated construction of the shelves makes it easy to attach additional accessories such as multiple shelves, dispensers and more… (no tools required) and can be easily moved when needed.
The complete packing table includes tables, columns, metal shelves and slats. Alternatively, you can choose an electronically adjustable packing table, which in addition to the table itself also includes three columns and two perforated back walls. You can then add accessories as required.
If you need help choosing a packing table, contact our packaging specialists who are available weekdays from 8:00 to 16.30 on 44 58 77 00, via Live Chat and by e-mail: info@rajapack.dk
When putting together and setting up your packing table, it is important to always keep the concept of ‘ergonomics’ in mind. As you probably know, a poorly designed workplace can be a source of musculoskeletal disorders (MSA). Just think of a stiff neck, back or leg pain, etc. In this third step, we will therefore look at how to properly adjust your packing table so that it is comfortable for your employees to work at.
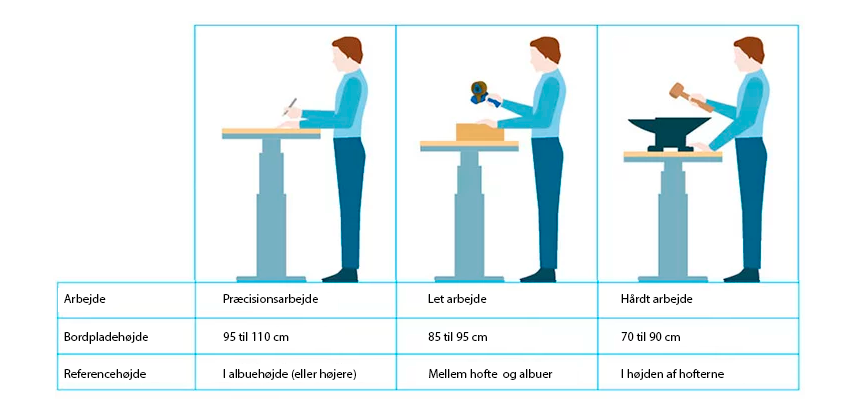
We start by setting the working height. It is best to follow the guidelines in the picture below. Packing is usually seen as ‘light work’, which means that you should adjust the table top to a height of around 85 to 95 cm. Use the height between your hips and elbows as a reference height.
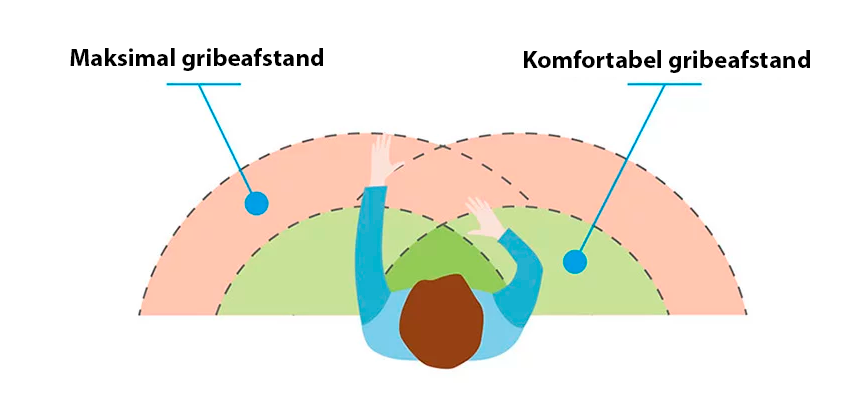
The tools you use most should always be within easy reach. That way you avoid having to bend and stretch your back, neck and arms too far. In the picture below, the ‘comfortable reach distance’ represents the location of the materials you reach for most often.This corresponds roughly to the distance between your wrist and elbow. You also have the ‘maximum grasp distance’. This corresponds to the distance between your wrist and shoulder (when you extend your arm). Here you place the materials you would use less often.
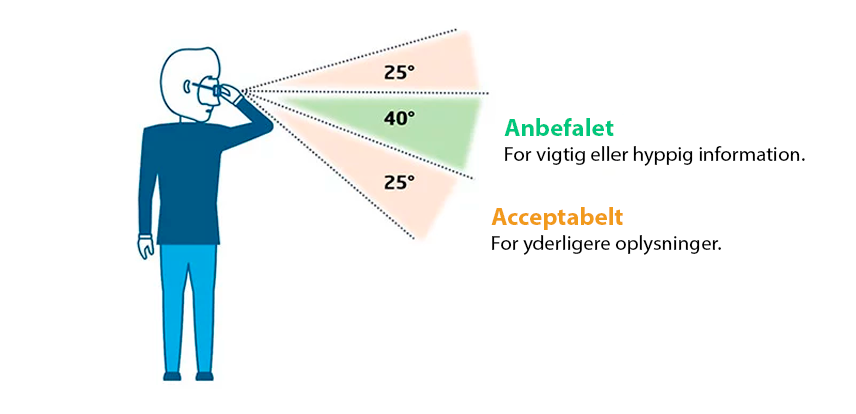
A cheat sheet with packing instructions or a screen with information about the order: they are often a very handy plus for those who want to pack quickly. Where is the best place to ‘visualise’ that information? For this, we take the horizon of your field of vision.It is best to visualise the important or frequent information at an angle of 40°. You can place additional information within an additional angle of 25° from above and below. This way your packer does not have to bend his neck unnecessarily and he can prevent complaints about MSA.
Should you have any questions about your setup, our specialists are ready to help! Via our website you can write to us in the live chat. You can also send us an email at info@rajapack.dk or give us a call on 44 58 77 00, and together we will find the right solution.
Also follow us on social media where we provide useful tips, and sign up for our newsletter where you will receive news and exclusive promotions directly to your inbox: